
SPOILER ALERT!
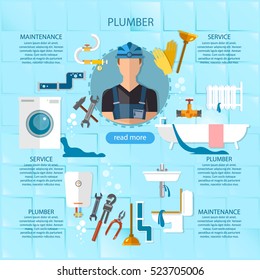
Start Your Pursuit To Repair That Leaky Tap Utilizing This Uncomplicated Overview, And Put An End To The Leaking For Good
Web Content Written By-Day Weiss
So, you've noticed that pesky drip coming from your faucet once more. Worry not, as fixing a dripping tap is not as challenging as it might appear. With a clear understanding of the detailed process and a little advice, you'll be amazed at just how easily you can tackle this usual home issue. Remain to discover the basic yet reliable methods to silence that constant drip once and for all.
To effectively deal with a leaky tap, the initial step is to collect all the required devices. You'll require an adjustable wrench, a screwdriver (both Phillips and flathead), plumber's tape, a towel or rag, and perhaps a flashlight. These tools will aid you navigate the different elements of the faucet and make certain a smooth repair procedure. See to it to have a pail or container handy to capture any water that might leak during the fixing.
Having all your devices in one area will conserve you time and irritation as you work on fixing the leakage.
Prior to starting, turn off the water system to the faucet to prevent any crashes or further leaks.
It's also an excellent concept to lay down some towels to secure the location from water damages.
When identifying the sort of tap you're taking care of, the primary step is to observe the design and framework of the component. Different sorts of taps have distinctive attributes that can help you establish the best approach for repairing them. Start by examining if the faucet has separate handles for cold and hot water. If it does, it's likely a compression tap. These typically have an even more traditional look with two separate handles.
One more typical kind is the round faucet, which is identified by its single manage that relocate all directions. These faucets prevail in several homes and require particular repair strategies.
Next off, there are cartridge faucets that feature a solitary manage for both cold and hot water. These are recognized for their smooth and effortless operation.
Last but not least, there are disc faucets that have a single lever and are recognized for their sturdiness. By understanding https://www.tapinto.net/towns/sparta/articles/6-tips-for-getting-your-nj-home-renovated-on-reality-tv of faucet you have, you can proceed with the proper repair steps.
Beginning the repair service process for a leaking tap requires gathering the essential devices and products prior to proceeding. Begin by turning off the water to the tap. This can usually be done by situating the shut-off valves under the sink and transforming them clockwise till they're firmly shut. As soon as the water is off, connect the drain to avoid any kind of little parts from falling down the sink.
Next off, thoroughly take apart the tap take care of making use of a screwdriver or hex key, depending upon the sort of manage. Check the parts for any kind of indicators of wear or damages. https://www.google.com/search?q=NOCO+Repair&ludocid=16496578718425247327&lpsid=CIHM0ogKEICAgICrvdGNlQE&source=sh/x/localposts&lsig=AB86z5XfDZOyxepf1Mc1VqmyBvqk&entry=tts&g_ep=EgoyMDI0MTAxNC4wIPu8ASoASAFQAw%3D%3D for leaks are damaged washing machines or O-rings, which may require to be replaced. Take the defective parts to a hardware store to locate the appropriate substitutes.
After changing the broken components, reassemble the faucet handle in the reverse order of how you took it apart.
Transform the supply of water back on and check the faucet for any kind of leakages. If the leak lingers, you might require to seek expert aid to attend to the issue even more.
Final thought
Congratulations! You've successfully repaired your leaky faucet utilizing this step-by-step guide for newbies. By recognizing the type of tap, gathering the required devices, and meticulously complying with each action, you've conserved water and stopped further damages. Keep up the good work and tackle more house repairs with confidence!
So, you've noticed that pesky drip coming from your faucet once more. Worry not, as fixing a dripping tap is not as challenging as it might appear. With a clear understanding of the detailed process and a little advice, you'll be amazed at just how easily you can tackle this usual home issue. Remain to discover the basic yet reliable methods to silence that constant drip once and for all.
Gather Necessary Tools
To effectively deal with a leaky tap, the initial step is to collect all the required devices. You'll require an adjustable wrench, a screwdriver (both Phillips and flathead), plumber's tape, a towel or rag, and perhaps a flashlight. These tools will aid you navigate the different elements of the faucet and make certain a smooth repair procedure. See to it to have a pail or container handy to capture any water that might leak during the fixing.
Having all your devices in one area will conserve you time and irritation as you work on fixing the leakage.
Prior to starting, turn off the water system to the faucet to prevent any crashes or further leaks.
It's also an excellent concept to lay down some towels to secure the location from water damages.
Recognize the Type of Faucet
When identifying the sort of tap you're taking care of, the primary step is to observe the design and framework of the component. Different sorts of taps have distinctive attributes that can help you establish the best approach for repairing them. Start by examining if the faucet has separate handles for cold and hot water. If it does, it's likely a compression tap. These typically have an even more traditional look with two separate handles.
One more typical kind is the round faucet, which is identified by its single manage that relocate all directions. These faucets prevail in several homes and require particular repair strategies.
Next off, there are cartridge faucets that feature a solitary manage for both cold and hot water. These are recognized for their smooth and effortless operation.
Last but not least, there are disc faucets that have a single lever and are recognized for their sturdiness. By understanding https://www.tapinto.net/towns/sparta/articles/6-tips-for-getting-your-nj-home-renovated-on-reality-tv of faucet you have, you can proceed with the proper repair steps.
Step-by-Step Repair Process
Beginning the repair service process for a leaking tap requires gathering the essential devices and products prior to proceeding. Begin by turning off the water to the tap. This can usually be done by situating the shut-off valves under the sink and transforming them clockwise till they're firmly shut. As soon as the water is off, connect the drain to avoid any kind of little parts from falling down the sink.
Next off, thoroughly take apart the tap take care of making use of a screwdriver or hex key, depending upon the sort of manage. Check the parts for any kind of indicators of wear or damages. https://www.google.com/search?q=NOCO+Repair&ludocid=16496578718425247327&lpsid=CIHM0ogKEICAgICrvdGNlQE&source=sh/x/localposts&lsig=AB86z5XfDZOyxepf1Mc1VqmyBvqk&entry=tts&g_ep=EgoyMDI0MTAxNC4wIPu8ASoASAFQAw%3D%3D for leaks are damaged washing machines or O-rings, which may require to be replaced. Take the defective parts to a hardware store to locate the appropriate substitutes.
After changing the broken components, reassemble the faucet handle in the reverse order of how you took it apart.
Transform the supply of water back on and check the faucet for any kind of leakages. If the leak lingers, you might require to seek expert aid to attend to the issue even more.
Final thought
Congratulations! You've successfully repaired your leaky faucet utilizing this step-by-step guide for newbies. By recognizing the type of tap, gathering the required devices, and meticulously complying with each action, you've conserved water and stopped further damages. Keep up the good work and tackle more house repairs with confidence!
